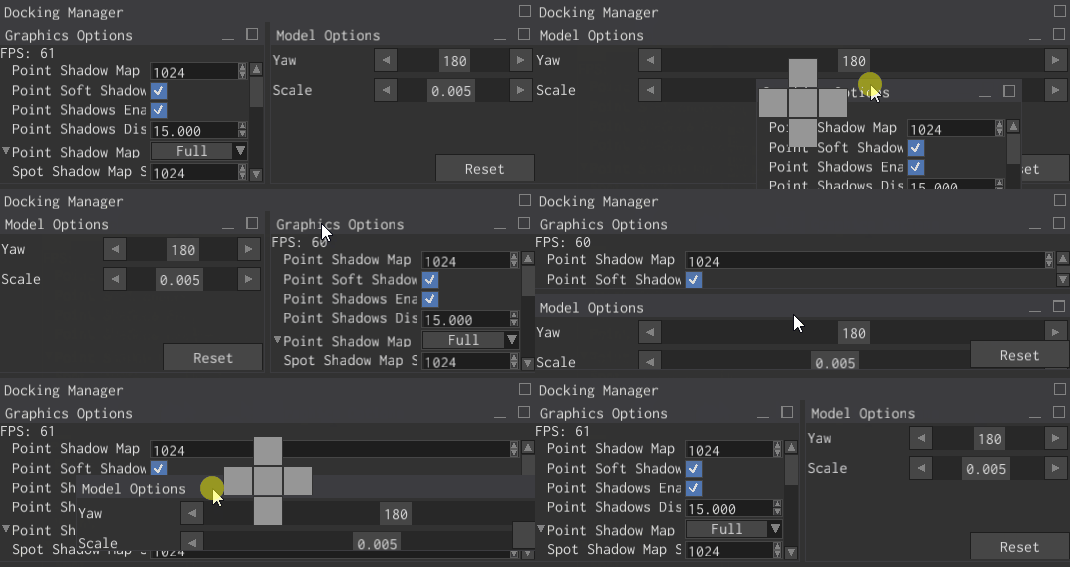
Docking manager

Docking manager is a special container widget, that holds a bunch of children widgets in-place
using Tiles and a bunch of floating windows. Any window can be undocked and become a floating
window and vice versa. Docking manager is typically used to “pack” multiple windows into a
rectangular. The most notable use case is IDEs where you can drag,
dock, undock, stack windows.
Tiles
The main element of the docking manager is the Tile widget, which can be in two major states:
- It can hold a window
- It can be split into two more sub-tiles (either vertically or horizontally), which can in their turn either contain some other window or a sub-tile. This structure essentially forms a tree of pretty much unlimited depth. This approach basically allows you to “pack” multiple windows in a rectangular area with no free space between the tiles. Split tiles have a special parameter called splitter, which is simply a fraction that shows how much space each half takes. In the case of a horizontal tile, if the splitter is 0.25, then the left tile will take 25% of the width of the tile and the right tile will take the rest 75% of the width.
Floating Windows
The docking manager can control an unlimited number of floating windows, floating windows can be docked and vice versa. When a window is undocked, it is automatically placed into a list of floating windows. Only the windows from this list can be docked.
Example
The following example shows how to create a docking manager with one root tile split vertically into two smaller tiles where each tile holds a separate window.
#![allow(unused)]
fn main() {
fn create_docking_manager(ctx: &mut BuildContext) -> Handle<DockingManager> {
    let top_window = WindowBuilder::new(WidgetBuilder::new())
        .with_title(WindowTitle::text("Top Window"))
        .build(ctx);
    let bottom_window = WindowBuilder::new(WidgetBuilder::new())
        .with_title(WindowTitle::text("Bottom Window"))
        .build(ctx);
    let root_tile = TileBuilder::new(WidgetBuilder::new())
        .with_content(TileContent::VerticalTiles {
            splitter: 0.5,
            tiles: [
                TileBuilder::new(WidgetBuilder::new())
                    // Note that you have to put the window into a separate tile, otherwise
                    // you'll get unexpected results.
                    .with_content(TileContent::Window(top_window))
                    .build(ctx),
                TileBuilder::new(WidgetBuilder::new())
                    .with_content(TileContent::Window(bottom_window))
                    .build(ctx),
            ],
        })
        .build(ctx);
    DockingManagerBuilder::new(
        WidgetBuilder::new()
            .with_child(root_tile)
            .with_width(500.0)
            .with_height(500.0),
    )
    .build(ctx)
}
}
Layout
The current docking manager layout can be saved and restored later if needed. This is a very useful option for customizable user interfaces, where users can adjust the interface as they like, save it and then load on the next session. Use the following code to save the layout:
#![allow(unused)]
fn main() {
fn save_layout(
    ui: &UserInterface,
    docking_manager_handle: Handle<DockingManager>,
) -> Option<DockingManagerLayoutDescriptor> {
    ui.try_get(docking_manager_handle)
        .ok()
        .as_ref()
        .map(|docking_manager| docking_manager.layout(ui))
}
}
The layout can be restored by sending a DockingManagerMessage::Layout message to the docking
manager. Use DockingManagerMessage::layout builder method to make one.
To be able to restore the layout to its defaults, just create a desired layout from code,
save the layout and use the returned layout descriptor when you need to restore the layout
to its defaults.