Vector image
Vector image is used to create images, that consists from a fixed set of basic primitives, such as lines, triangles, rectangles, etc. It could be used to create simple images that can be infinitely scaled without aliasing issues.
How To Create
There are two major ways to create a vector image widget - using the editor and from code.
Using the Editor

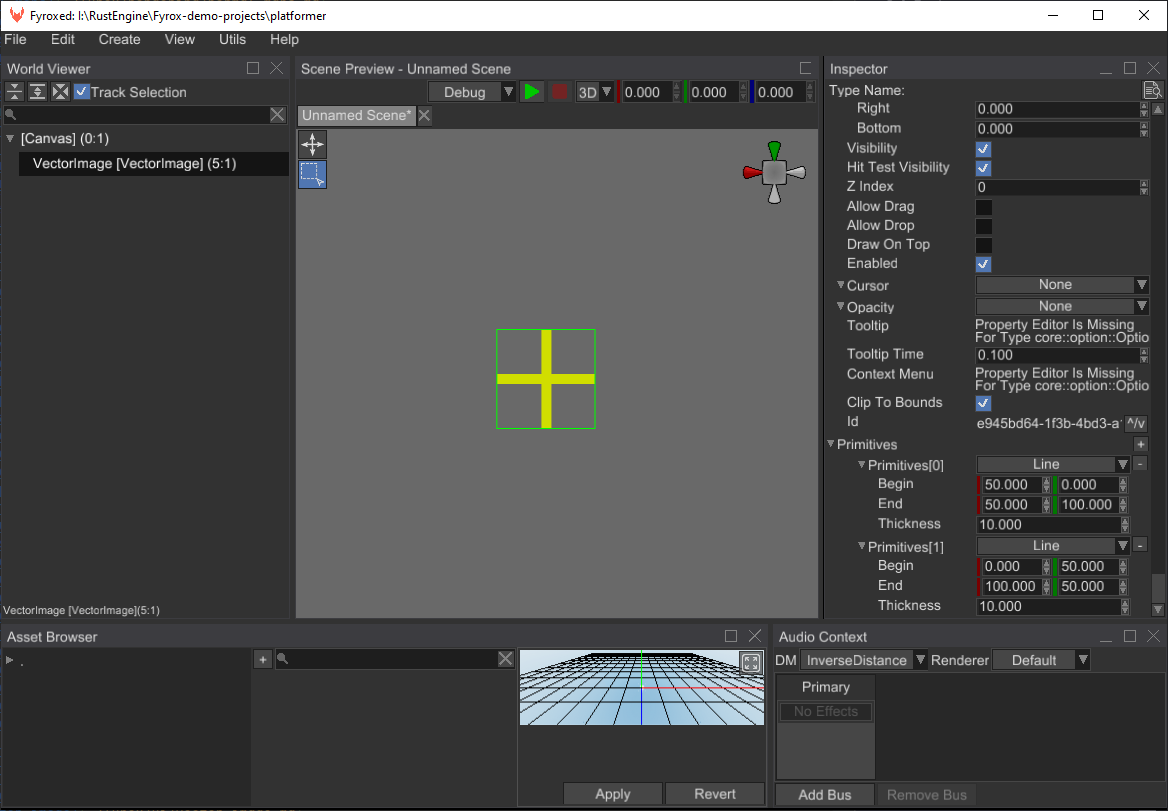
To create a vector image from the editor, go to Create -> UI and press Vector Image there. An empty image
should be created and selected, now all you need to do is to fill it with a set of pre-defined shapes. For example,
on the picture above there are two yellow lines forming a cross.
From Code
The following example creates a cross shape with given size and thickness:
#![allow(unused)]
fn main() {
fn make_cross_vector_image(
    ctx: &mut BuildContext,
    size: f32,
    thickness: f32,
) -> Handle<VectorImage> {
    VectorImageBuilder::new(
        WidgetBuilder::new()
            // Color of the image is defined by the foreground brush of the base widget.
            .with_foreground(ctx.style.property(Style::BRUSH_BRIGHT)),
    )
    .with_primitives(vec![
        Primitive::Line {
            begin: Vector2::new(0.0, 0.0),
            end: Vector2::new(size, size),
            thickness,
        },
        Primitive::Line {
            begin: Vector2::new(size, 0.0),
            end: Vector2::new(0.0, size),
            thickness,
        },
    ])
    .build(ctx)
}
}
Keep in mind that all primitives located in local coordinates. The color of the vector image can be changed by setting a new foreground brush.